How to Build a Productivity Application in React: Part 1
Claire Sinozich
29 Mar 2019
•
7 min read
If you’re a developer and you haven’t heard of the Pomodoro Technique yet, I highly suggest you check it out. As a full stack student especially, I’ve found it to be a wonderful tool to track how long it takes me to tackle new ideas, new languages, and new libraries. While learning React, I put together a productivity application including a Pomodoro timer that I thought I could share with you all.
One of the greatest ways to learn React and its many capabilities is to build a productivity application. I know, I know, there are dozens of them out here, and they’re all likely better than this one. But, this tutorial will walk you through how to build a React Application from beginning to end: a to-do list, a to-do input form, a Pomodoro timer, search functionality, and local storage login authentication.
To see the code for this project on GitHub, click here. For this tutorial, I will be using Create React App, yarn, and Styled Components. This tutorial will walk you through, step-by-step, from creating your React app to styling it with Styled Components.
Creating and Starting your React App
First steps first: let’s set up our React app. Using Yarn and Create React App, I built a project folder called timer-tutorial that houses my React App:
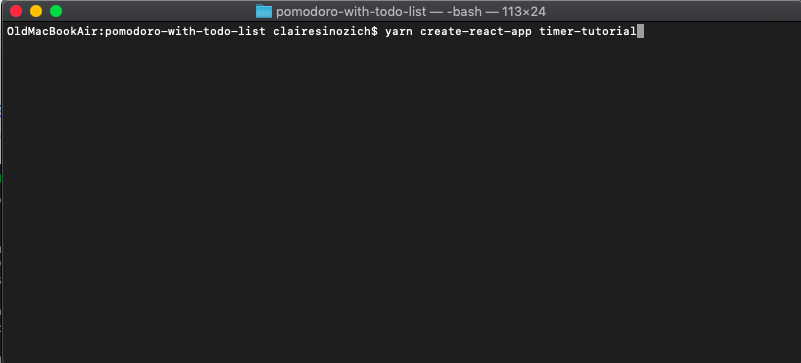
The command line to create a React app with Create React App and Yarn
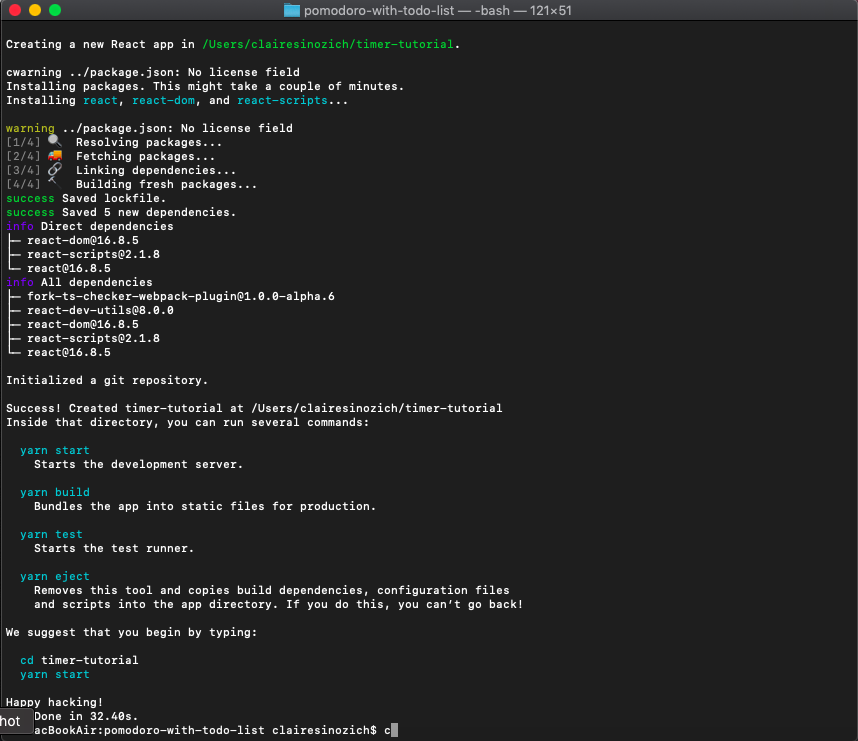
After your app is created, your terminal will give you options for next commands to run.
At this point, you can run the command yarn start in your terminal, and your app will open up in a browser with http://localhost:3000/. When you open up your documents, your file tree will look something like this:
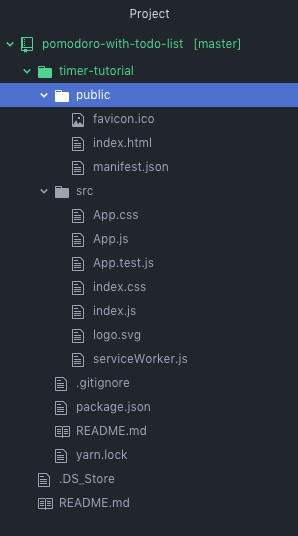
Now, if you’re just building a simple application like this timer and to-do list, feel free to go and delete some of these files, as well as their references inside of your javascript files. I typically delete logo.svg, serviceWorker.js, and App.test.js at the beginning, as well as all of my CSS files (CSS files are deleted because this project is styled with Styled Components). This will give you a clean slate to start your project with! Keep in mind that more complicated applications will require you keeping some of these files.
By now, your application should look something like this:
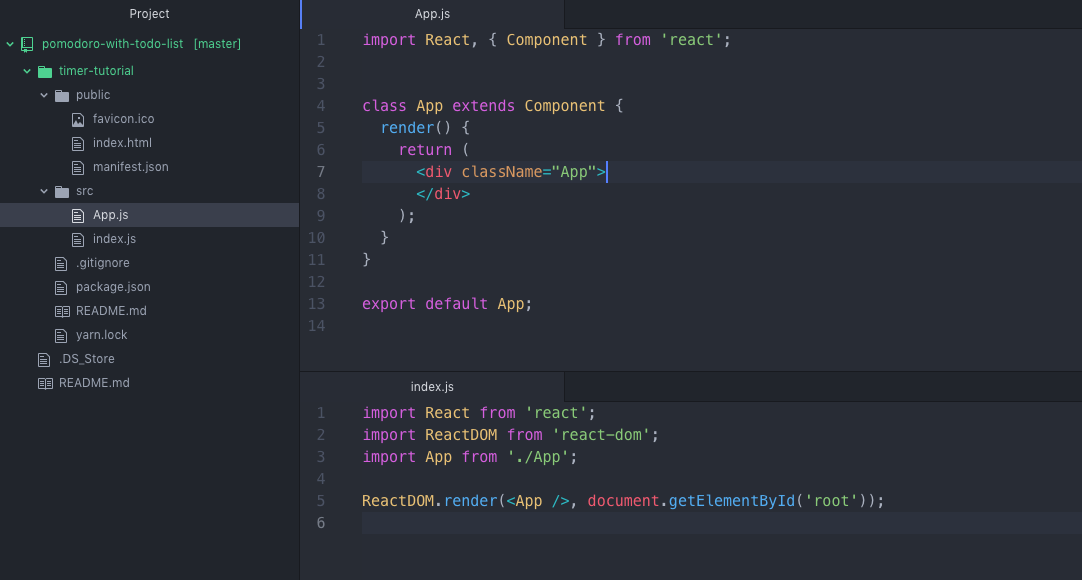
Note the split pages to show App.js and index.js
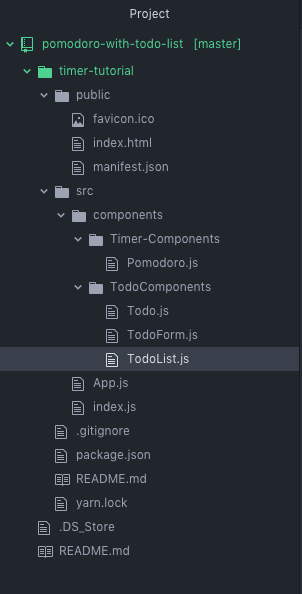
At this point, I prefer to build out all of my files in advance, based on the components that I believe I will need. My file tree at the beginning of this project is below, but you should certainly manage your files however you feel is best! Keep in mind that you must build these file trees inside of your src folder, and best practice is to have a components folder that encases all of your components. Further, your directories and files should all have semantic naming practices.
Starting your To-Do App
At this point, your local server should be completely blank, if you deleted the content inside of your App.js file, along with the styling in the CSS files.
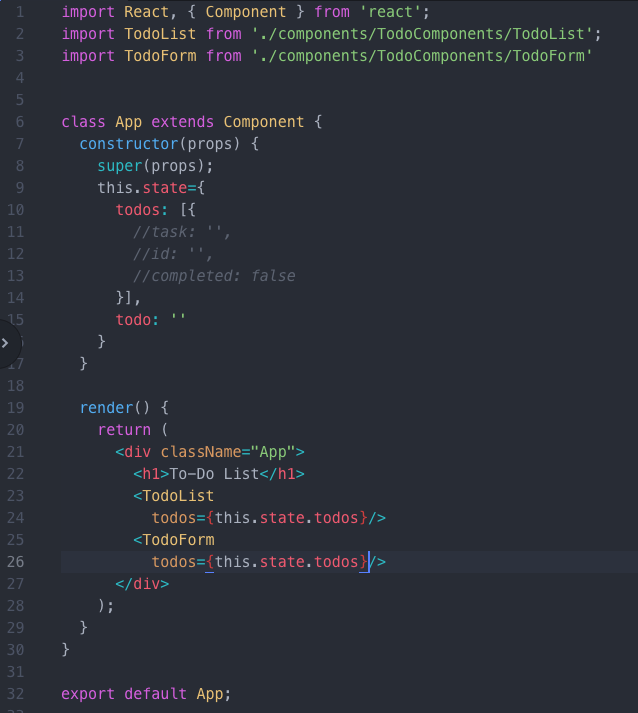
Introducing State
The first thing that we’re going to want to do is introduce state into our App class. Our state is going to contain the data for both the tasks and the timer. Let’s start by giving state an empty array to hold all of our to-dos, and an empty string to hold an individual to-do.
Adding these empty key-value pairs will allow us to manipulate state later, when we get to adding and removing to-do tasks. If this feels like too many ‘to-do’ uses, use other names for these variables! Just be sure to remain consistent throughout your entire app.
Let’s also give some form to the todos array. This won’t be instantiated formally, but we will use these aspects of our todos when building the application:
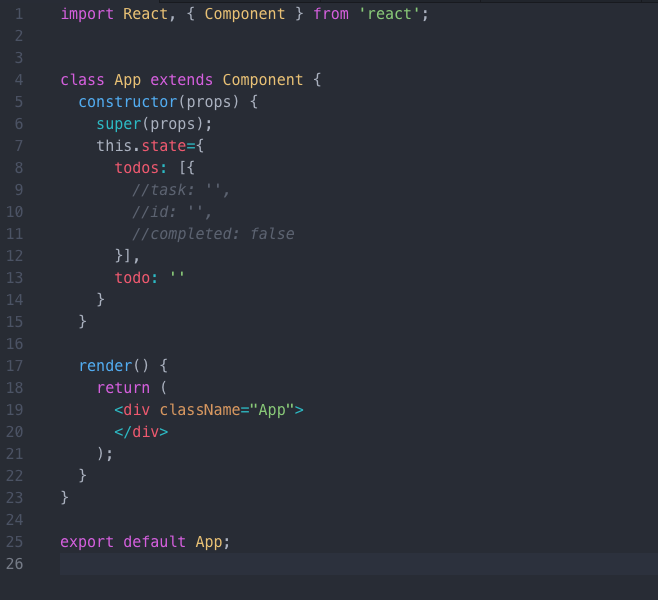
Each todo will contain a task name, an id, and a boolean value based on item completion. Each of our todo items will exist as objects inside of our todos array, as shown above.
Building the To-do Task Component
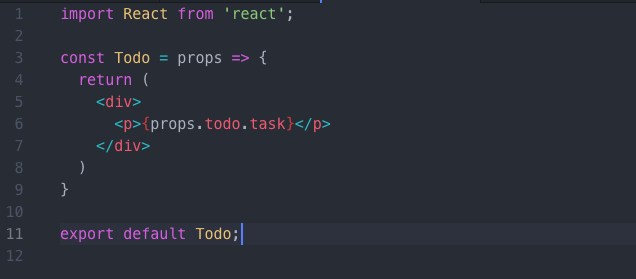
Now, let’s go into our Todo.js file. This is where the individual todo components will live, and they’ll be repeatedly rendered in our TodoList.js file. For now, all we’re going to do is build a basic component, and we’ll come back in and add styling and click handlers later.
First, build a functional component that takes props as an argument. We’ll pass props to Todo from TodoList.js in a moment. Inside that functional component, return a div and a paragraph inside of JSX, with the name of the task passed in dynamically with props. Remember that we have a blank todo item in our App’s state.
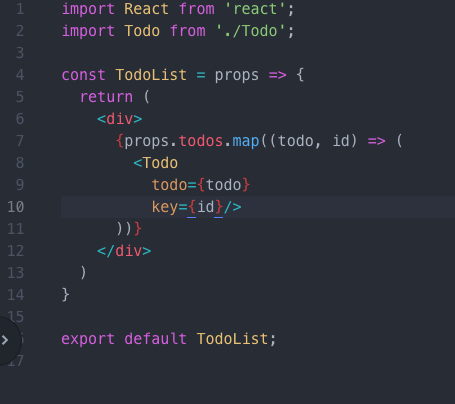
Rendering our To-do Task Component in the To-do List
Now we’re going to pop over to TodoList.js, where we’re going to render out our Todos as they come into our form. In order to render our Todo items, we must create a functional component, and then map over the array of todos from our App’s this.state we defined earlier. This array is currently empty! We’ll be able to add to it later.
Mapping over this array with the .map method requires a callback function, which we build anonymously here. We’ll pass in each todo from App’s this.state here through props. React requires that children of components have unique identifiers (known as keys), so we’ll also pass in each to-do item’s id. Then with our arrow function, for each to-do item and its id, we’ll render our Todo component. Here, we’re successfully passing in each to-do item from our array as props onto the Todo component.
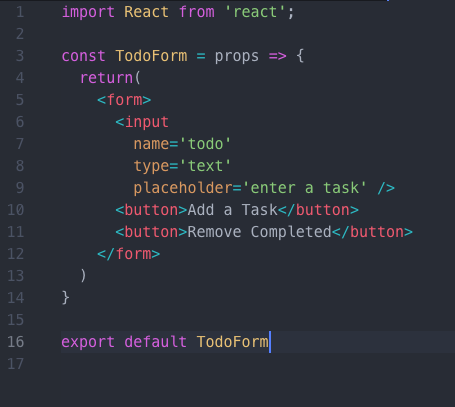
Building the To-do Input Form
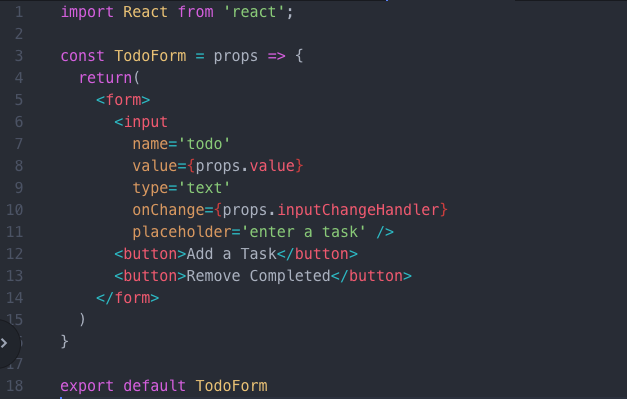
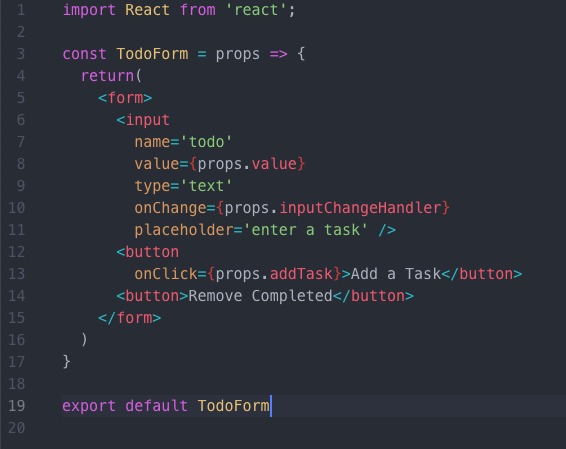
Our next step is building the base for the input form that will allow you to add tasks. Let’s build a functional component, taking props as an argument (from App’s state), and returning a form. Inside this form, you’ll need an input (I’ve added some of the details we’ll need like name), and two buttons: one for adding a task, and one for removing the completed tasks.
In the next section, we’ll start building functions to make sure that your input is assigned to state, and that your buttons are functional. For now, we’ll just leave it be.
Adding Components to our App
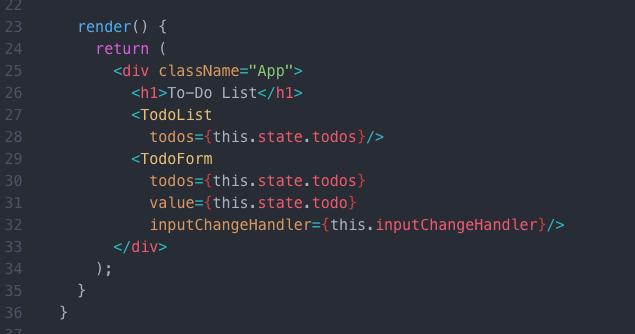
To finish up the setup for our to-do list, let’s make sure that we’ve rendered the components through our App.js file, and pass all the appropriate props that we need for now.
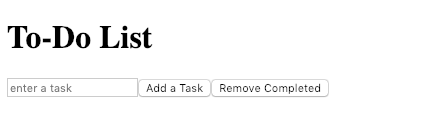
Congratulations! With this, you should be able to look into your browser and see a very basic application:
Adding Functionality to Our To-Do List and Form
The next step is making the to-do list actually work! Let’s start with our input function. We want to be able to type a task into our input field and add it to our state. I have built this application with functional components where possible, so all of my functions will live inside of App.js, where they can access state.
Adding a Change Handler to our Form Input
In the function inputChangeHandler below, state is set on our App’s class component by using this.setState(). Taking in an event as an argument, the input change handler sets the name of the event target to the value of the event target. This function is essentially taking what you type into the input bar, and adding it to state.

Now, let’s go ahead and pass our function and the value variable from App down to our TodoForm using props. The value variable is passed as our empty todo string from App’s state. This is because the value of the input field will be the name of the individual todo item.
Let’s also add our value and our input change handler to our TodoForm component using props. Our function inputChangeHandler() is going to be passed into our input field as an onChange function, so that the App’s state will be set as the input value changes.
Adding a Task to our To-do List
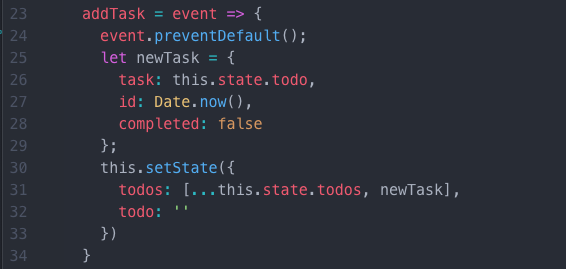
After you’ve tied your inputChangeHandler() function to the TodoForm, let’s add in some more functionality for the Add a Task button. In your App.js file, create a method on your class called addTask. This function will take a click event, and create a newTask, built after the todo format we laid out earlier. Don’t forget to use our event.preventDefault() method, which will stop the page from refreshing every time you add a new to-do item.
In this newTask, you will set the name of the task to this.state.todo to transfer the value of the input field to the newTask. The id can be anything here, as long as you can guarantee that they’ll be unique identifiers for each task. Here, I’ve used the method Date.now() to automatically capture local time and add it as an id. And, if you’re adding a task to a to-do list, it certainly won’t have been completed yet! So, set that boolean for completed to false.
Once you’ve built a newTask, we want to be able to add that onto the array of todos that are displayed in the TodoList. Let’s use the setState() method to add newTask to this.state.todos using the spread operator to make sure you only have one array. After, reset todo to an empty string so it can be filled in again.
Now, we’ll pass this down to our TodoForm component using props:
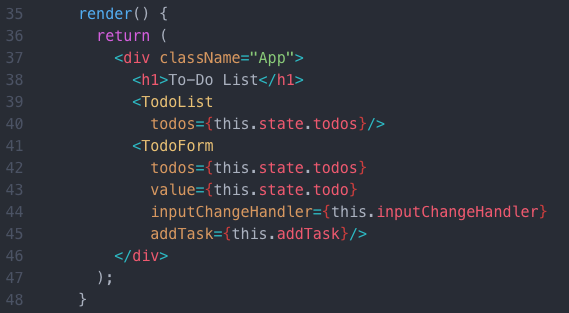
Then, we’ll add addTask() as an onClick function to our Add a Task button:
And, voila! You can now type tasks into your input field, and when you click on your button, it’ll add a task to your to-do list. Congratulations! You’ve officially built a to-do list with React.
Ready to continue on? Check back soon for Part 2, where we’ll add functionality to toggle items as completed, and remove completed items.
Claire Sinozich
I'm currently a student at Lamba School's Full Stack Web Development program.
See other articles by Claire

WorksHub
Jobs
Locations
Articles
Ground Floor, Verse Building, 18 Brunswick Place, London, N1 6DZ
108 E 16th Street, New York, NY 10003
Subscribe to our newsletter
Join over 111,000 others and get access to exclusive content, job opportunities and more!